
Nothing is more relaxing than the soft crackle of a burning wood wick and subtle aroma of your favourite scent.
Soy candle making is a quick, inexpensive project with tons of room for your own preferences and creativity to shine. It’s easy to get started and it will only take an hour or so.
Soy wax is fast becoming the preferred wax used to make candles due to its many superior qualities including:
- Superior scent throw
- Longer burn time
- Little to no soot
- Burns evenly and clean
This is one of the easiest crafts projects around, and these little beauties make awesome gifts. These instructions will give you a good foundation for making soy wax candles.
Making these candles is particularly easy because soy wax is not nearly as sticky as the paraffin used in most commercial candles.
Here is a step-by-step guide to making soy candles with just a few supplies bought online and equipment found in the house.
Tools You Will Need
It doesn’t cost a lot of money to make soy candles. All you need are these totally affordable, basic tools.
- 1x Mason Jar or any old jar.
- 1x Scissors
- 1x Double sided tape or glue
- Masking Tape
- Thermometer (optional)
Candle Supplies You Will Need
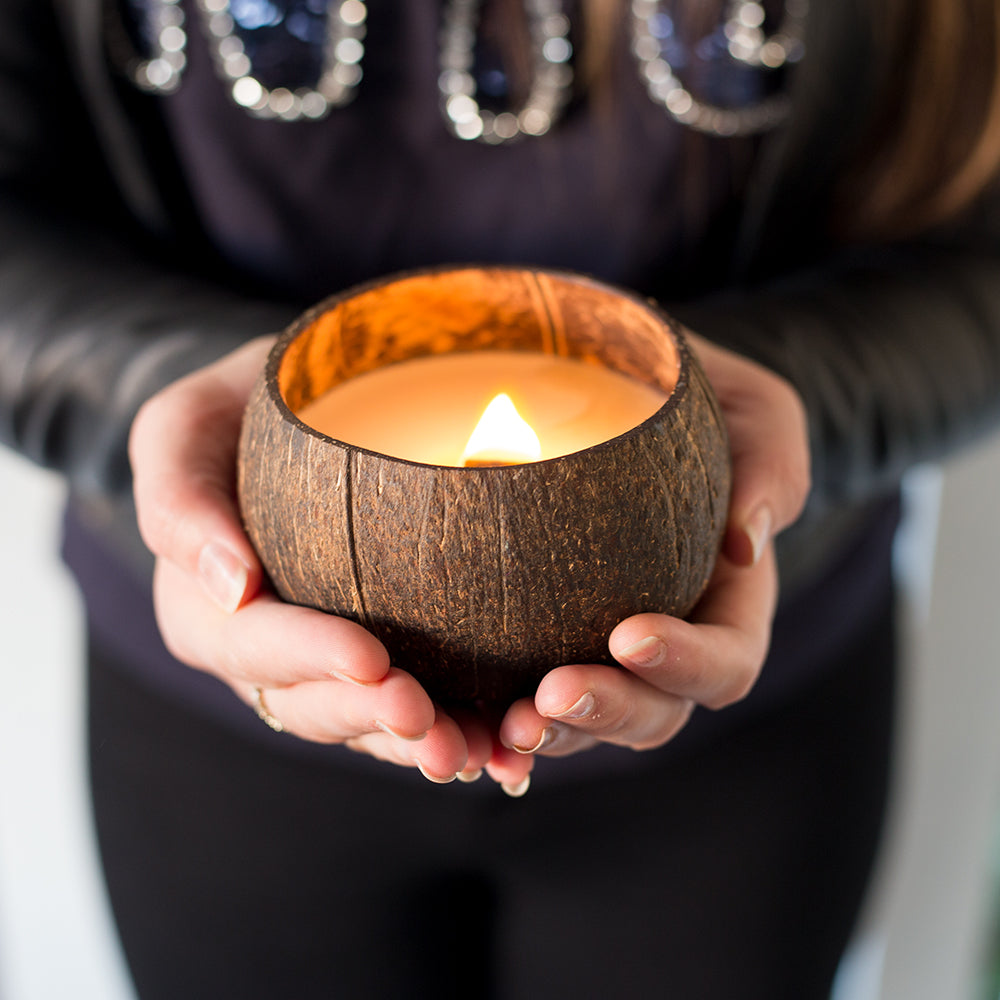
- Coconut Shell
- Wooden wick with metal stopper
- Fragrance oil
- Soy wax flakes
Candle Making Instructions
Once you have all the necessary equipment you can begin making your custom soy candle following the steps below.
Step 1 - Melt The Soy Wax

Melt the wax in a pan over medium heat or in a microwave-safe container and on high. A Pyrex jug works best for holding the wax to melt because it allows for easy handling.
Step 2 - Add Your Fragrance

When it’s all nice and melted, let it cool just a bit. Then stir in essential oils (about 4 drops per cup of melted wax) to scent the wax.
How much fragrance oil do I add to my wax?
Determine what percentage of fragrance you want to start with, between 5 - 7% of fragrance oil is best. Each type of wax has different maximum fragrance percentages, please refer to the individual wax product label for specific information.
We recommend adding approximately 10mls of fragrance to each coconut shell candle.
Every fragrance will affect your soy wax differently. You may find one particular scent causes your wax to dry lumpy or 'curdle' If this happens drop the scent percentage back and try another candle. Keep doing this until you strike a balance. Don’t forget to also experiment with the pour temperature. Try hotter.
Try our toasted coconut fragrance here.
Step 3 - Prepare The Coconut Shell

It is important you seal the inside of your coconut shell. Some shells are naturally porous which can't be seen by the naked eye. We recommend giving the inside of the shell another coat of coconut oil or if you want to be 100% sure you can use a natural sealer like Linseed or Tung oil.
Place the wick in the centre of the candle, make sure to keep it centred. Stick in place with double sided tape or craft glue and let it set.
TOP TIP:
It’s helpful to stabilise the wick to keep it straight and in one place as you pour the wax. To do this snip a hole in the middle of a piece of masking tape, guide the top of the wick through the hole, and attach the tape on each side of the coconut shell rim.
You can purchase natural coconut shells here. All of our coconut shell candles are 100% eco-friendly and sustainably sourced.
Step 4 - Pour The Soy Wax

When the wax has reached the desired temperature (55 degrees), carefully pour it into each candle container, avoiding the tape and wick. Pour slowly to avoid creating air bubbles, which can make the surface of the finished candle look uneven.
Step 5 - Finishing Up

Let the candles cool at room temperature for at least 24 hours before burning. Cut the wick to the desired height and enjoy.
We recommend homemade candles to cure for a minimum of three days for a good scent throw. But, a cure time of 1 to 2 weeks is even better for an incredible strong candle scent!
When you sit back and light it for the first time take pride in the fact that you just made an eco-friendly candle upcycled materials that were destined to be thrown away.
Important! Candle Safety
Always keep out of reach of pets and children. Avoid exposure to drafts. Never leave a lit candle unattended. Discontinue burning when 1-2cm or less of wax remains.
Some coconut shells have been known to crack - although rare it is important you place the candle on a stable, heat resistant surface.
If you would like to make your own coconut shell candle - check out our supplies here.
4 comments
Hi Anna,
Yes any bowl will work. We find our natural and polished cups work best for candle making due to their smaller size. But you can also use our original coconut bowls and even jumbo coconut bowls.
Because those bowls are larger you will just need to use 2 wicks with those so they burn to each edge.
https://coconutsy.com.au/collections/make-your-own-coconut-shell-candle
All the best,
Lucy
Hi there , just wondering if all your coconut shells are fine to use for candle making ? Thankyou
Hi Sonja, we do offer larger discounts for 50+ and 100+ shells. Please email us customercare@coconutsy.com.au
We will send you our full price list.
Thanks Lucy.
Hi just wondering your large coconut shell for candles making if I was to purchase 50 off them what would be the price or 100 of them cheers sonja